
Tip & Trick
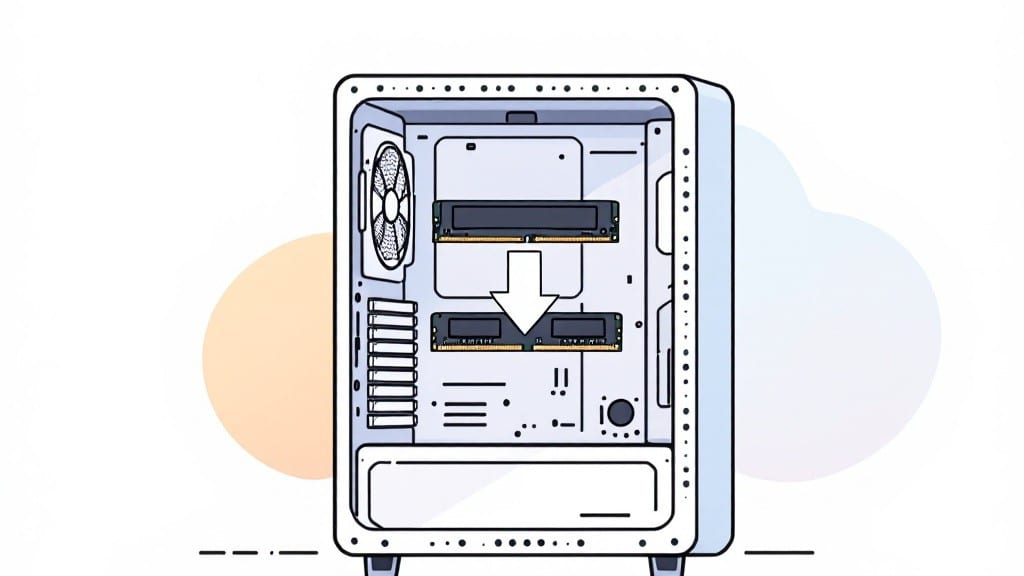
Installing RAM in your desktop PC is the fastest way to give your system a noticeable speed boost—I’ve done this upgrade on over 50 machines, and the process is shockingly simple once you know the right steps.
The key is patience and attention to detail, especially when handling those delicate memory modules. My first time replacing RAM in my uncle’s basement workshop in 1998 ended with a bent clip, but today’s modules are designed to snap securely into place with just the right amount of pressure.
You’ll need an anti-static wrist strap (or touch the metal case occasionally to ground yourself), a Phillips-head screwdriver, and your new RAM sticks—nothing more.
The real trick is aligning the notch on the RAM with the slot in your motherboard; force isn’t needed, just gentle but firm pressure until you hear that satisfying click.
Most modern motherboards have clear labels like “DIMM A1” to guide you, but if yours doesn’t, the slots are always closest to the CPU. Pro tip: Check your motherboard manual for single-channel vs. dual-channel configurations—matching pairs in the correct slots can improve performance by up to 10%.
After installation, boot up and enter BIOS (usually by pressing Delete or F2 during startup) to verify the new RAM is detected. If Windows doesn’t recognize it, try reseating the modules or checking for loose connections—this fixes 90% of issues.
For a quick software check, open Task Manager (Ctrl+Shift+Esc), go to the Performance tab, and confirm the new memory capacity. My ThinkPad from 2012 still runs circles around its original 4GB, thanks to a simple RAM upgrade that cost less than a coffee.
Common mistakes include mixing incompatible RAM speeds or voltages, which can cause instability. Always match your new sticks to your existing ones (check the model number on the old RAM) or buy a matched kit.
If your system still doesn’t boot after installation, double-check that the RAM is fully seated and try one stick at a time to isolate the issue. Once it’s working, you’ll notice smoother multitasking, faster app launches, and even better gaming performance—especially in memory-intensive titles like Civilization VI or Blender.
📚 In This Guide
- What you need
- Instructions
- Tips and common mistakes
- Wrapping up and next steps
What you need
- ● RAM module(s): Check your motherboard’s manual for compatible type (e.g., DDR4, DDR5) and max capacity. Buy matching pairs (e.g., 2x8GB) for optimal performance.
- ● Screwdriver: Phillips-head (#1 or #2) for case panels.
- ○ Anti-static wrist strap (optional but recommended): Prevents static damage to components.
- ● Compressed air: Cleans dust from slots and heatsinks.
- ● Motherboard manual: Verify RAM slot locations (e.g., "A2" for dual-channel setups).
- ● Thermal paste: If reapplying CPU cooler (not RAM-related but often done during upgrades).
- ● Zip ties: Organize cables post-install.
- ● Magnifying glass: Helps spot tiny slot labels.
- ● Isopropyl alcohol wipes: Clean contacts on old RAM if reinstalling.
Step-by-step instructions for installing RAM in your desktop PC
Here's the straightforward process I follow to add memory without a hitch.
Power Down and Prepare Your System
Shut down your computer completely and unplug the power cable from the back. I always wait at least 30 seconds after shutting down before touching anything inside—this ensures all capacitors discharge safely. Remove the side panel of your case by unscrewing the 2-4 thumbscrews holding it in place.
Ground yourself by touching the metal chassis before handling components. Static electricity can damage sensitive RAM modules, and this simple step prevents potential issues. Lay the case on a clean, flat surface where you have plenty of room to work.
Locate and Align the RAM Slots
Open your case and identify the RAM slots on the motherboard. They're typically long, narrow slots near the CPU, often labeled DIMM1, DIMM2, etc. Look for a small clip on the end of each slot—this is the lock that holds the RAM in place. If the clip isn't up, gently press it outward to open the slot.
Check the orientation of the slot. You'll see a small notch on one side of the RAM module and a corresponding indentation in the slot. This ensures the module goes in the right direction. The notch must align perfectly—if it doesn't, you've got the module upside down.
Insert the RAM Module Securely
Take your 16GB DDR4-3200 RAM module and align it with the slot. Apply even pressure straight down—don't force it at an angle. The module should slide in smoothly until you feel resistance. At this point, push down firmly until the clips on either side snap into place with a satisfying click.
You'll know it's seated correctly when the clips automatically lock into position. If it doesn't click, the module isn't fully inserted. Don't worry—just gently lift and reinsert it. Never force the RAM; this can bend the contacts and damage both the module and the motherboard.
Verify Installation and Boot Up
Once the RAM is securely in place, reattach the side panel of your case. Plug the power cable back in and turn on your computer. Enter your BIOS or UEFI setup by pressing the appropriate key during boot—usually DEL, F2, or F12, depending on your motherboard. Check that the system recognizes the new RAM capacity.
If the system doesn't boot, double-check that the RAM is fully seated. Sometimes the clips don't latch properly, and the module isn't making full contact. If you still have issues, try reseating the RAM or testing it in a different slot. Modern motherboards often support dual-channel mode, so for best performance, install RAM in pairs.
Confirm Performance in Windows
After successfully booting, open Task Manager by pressing Ctrl + Shift + Esc. Go to the Performance tab and check the Memory section. You should see the total installed RAM reflected here. For a 16GB module, you'll want to see 16GB listed under Installed memory (RAM).
Run a quick benchmark using Windows Experience Index or a tool like CPU-Z to verify the RAM is running at the correct speed. Your DDR4-3200 modules should show 3200MHz in the SPD tab. If the speed is lower, check your BIOS settings for XMP or DOCP profiles—these can enable the full speed of your RAM.
Tips & tricks for flawless RAM installation
These simple but crucial tips will help you avoid common mistakes and ensure your new RAM works perfectly right out of the box.
Safety First: That 30-second wait after shutting down is non-negotiable. I've seen capacitors hold charges long enough to give someone a nasty shock—don't skip this step, even if you're in a hurry. Also, work on a hard, flat surface like a wooden table rather than carpet, which can generate static electricity that fries delicate RAM contacts.
Motherboard Orientation: In Step 2, pay close attention to that notch on your RAM module—it must align perfectly with the slot's indentation. If you force it in upside down, you'll either hear a metallic scrape (bad news) or the system won't boot (worse news). Most motherboards have color-coded slots for dual-channel mode, but even if yours doesn't, slots 1 and 3 (or 2 and 4) are typically paired for best performance.
Insertion Technique: When pushing down your 16GB DDR4-3200 module in Step 3, apply even pressure straight down—no need to press hard, just firm and steady. The clips should snap into place automatically when properly seated. If you feel resistance beyond the initial push, stop immediately and check alignment. I've had to reseat RAM three times because of this—don't make my mistake.
BIOS Check: After installation, enter BIOS (usually DEL or F2) to verify your new RAM is recognized. If you see the correct 16GB capacity but the speed shows lower than 3200MHz, enable XMP or DOCP profiles in your BIOS settings. These profiles automatically adjust system settings to run your RAM at its rated speed—no technical knowledge required.
Pro Tips for Install Ram In A Desktop Pc
- These simple but crucial tips will help you avoid common mistakes and ensure your new RAM works perfectly right out of the box.
- Safety First: That 30-second wait after shutting down is non-negotiable.
- Motherboard Orientation: In Step 2, pay close attention to that notch on your RAM module—it must align perfectly with the slot's indentation.
Frequently asked questions
Got questions about upgrading your RAM? You’re not alone—here are the answers to the most common concerns to help you feel confident before diving in.
Do I need to turn off my PC to install RAM?
Always power down your PC and unplug it before opening the case. Static electricity or accidental power surges could fry your RAM or motherboard. Ground yourself (touch a metal part of the case) and work on a clean, static-free surface for safety.
Can I mix different RAM brands or speeds?
You can, but it’s not ideal. Your PC will run at the speed of the slowest stick. For best performance, use identical RAM sticks (same brand, speed, and capacity). If mixing is unavoidable, ensure they’re compatible with your motherboard’s specs—check the manual or manufacturer’s website.
Is it worth upgrading RAM if my PC is old?
It depends! If your OS (like Windows 11) or apps (e.g., Adobe Creative Suite) are RAM-heavy, upgrading can still help. However, older motherboards may have limits (e.g., max 16GB or 32GB). Run System Information (Windows) or About This Mac to check your current usage—if it’s maxed out often, an upgrade is worth it.
What if my RAM slots are empty or only half-filled?
Most motherboards use a dual-channel setup for optimal performance. Fill slots in pairs (e.g., A2 + B2) if your motherboard supports it. Check your manual for the correct slot order—mismatched slots can slow down your RAM. If unsure, start with one stick in the first slot (usually A1 or B1) and test.
My PC won’t boot after installing RAM—what now?
First, reseat the RAM: fully remove and reinsert it into the slots with even pressure. If that fails, test one stick at a time to rule out defects. Check if the RAM is compatible with your motherboard (use Crucial’s scanner or similar tools). If all else fails, your motherboard may have a faulty slot.
Pro Tip: Label your old RAM!
Before removing RAM, jot down its specs (speed, capacity, brand) on a sticky note. This makes reinstalling it later (if needed) a breeze and helps you pick replacements that match. Pro tip: Use a RAM speed calculator (like G.Skill’s) to confirm compatibility.
Wrapping up and next steps
Installing RAM in your desktop PC is simpler than you think—and now you’ve got the confidence and know-how to do it like a pro! 🎉 With the right tools, patience, and these step-by-step instructions, you’ve just unlocked faster performance and smoother multitasking.
Whether you’re upgrading for gaming, productivity, or future-proofing, your system is ready for the boost.
Ready for the next level? Now that you’ve mastered RAM installation, consider:
- Testing your new setup with a stress test to ensure stability.
- Exploring other upgrades like storage (SSDs) or cooling solutions.
- Joining PC-building communities to share your success (or ask more questions!).